mirror of
https://github.com/nagisa77/OpenIsle.git
synced 2026-02-18 21:10:57 +08:00
117 lines
3.2 KiB
Markdown
117 lines
3.2 KiB
Markdown
#### **⚠️注意:仅想修改前端的朋友可不用部署后端服务**
|
||
|
||
## 如何部署
|
||
|
||
> Step1 先克隆仓库
|
||
|
||
```shell
|
||
git clone https://github.com/nagisa77/OpenIsle.git
|
||
cd OpenIsle
|
||
```
|
||
|
||
> Step2 后端部署
|
||
|
||
```shell
|
||
cd backend
|
||
```
|
||
|
||
以IDEA编辑器为例,IDEA打开backend文件夹。
|
||
|
||
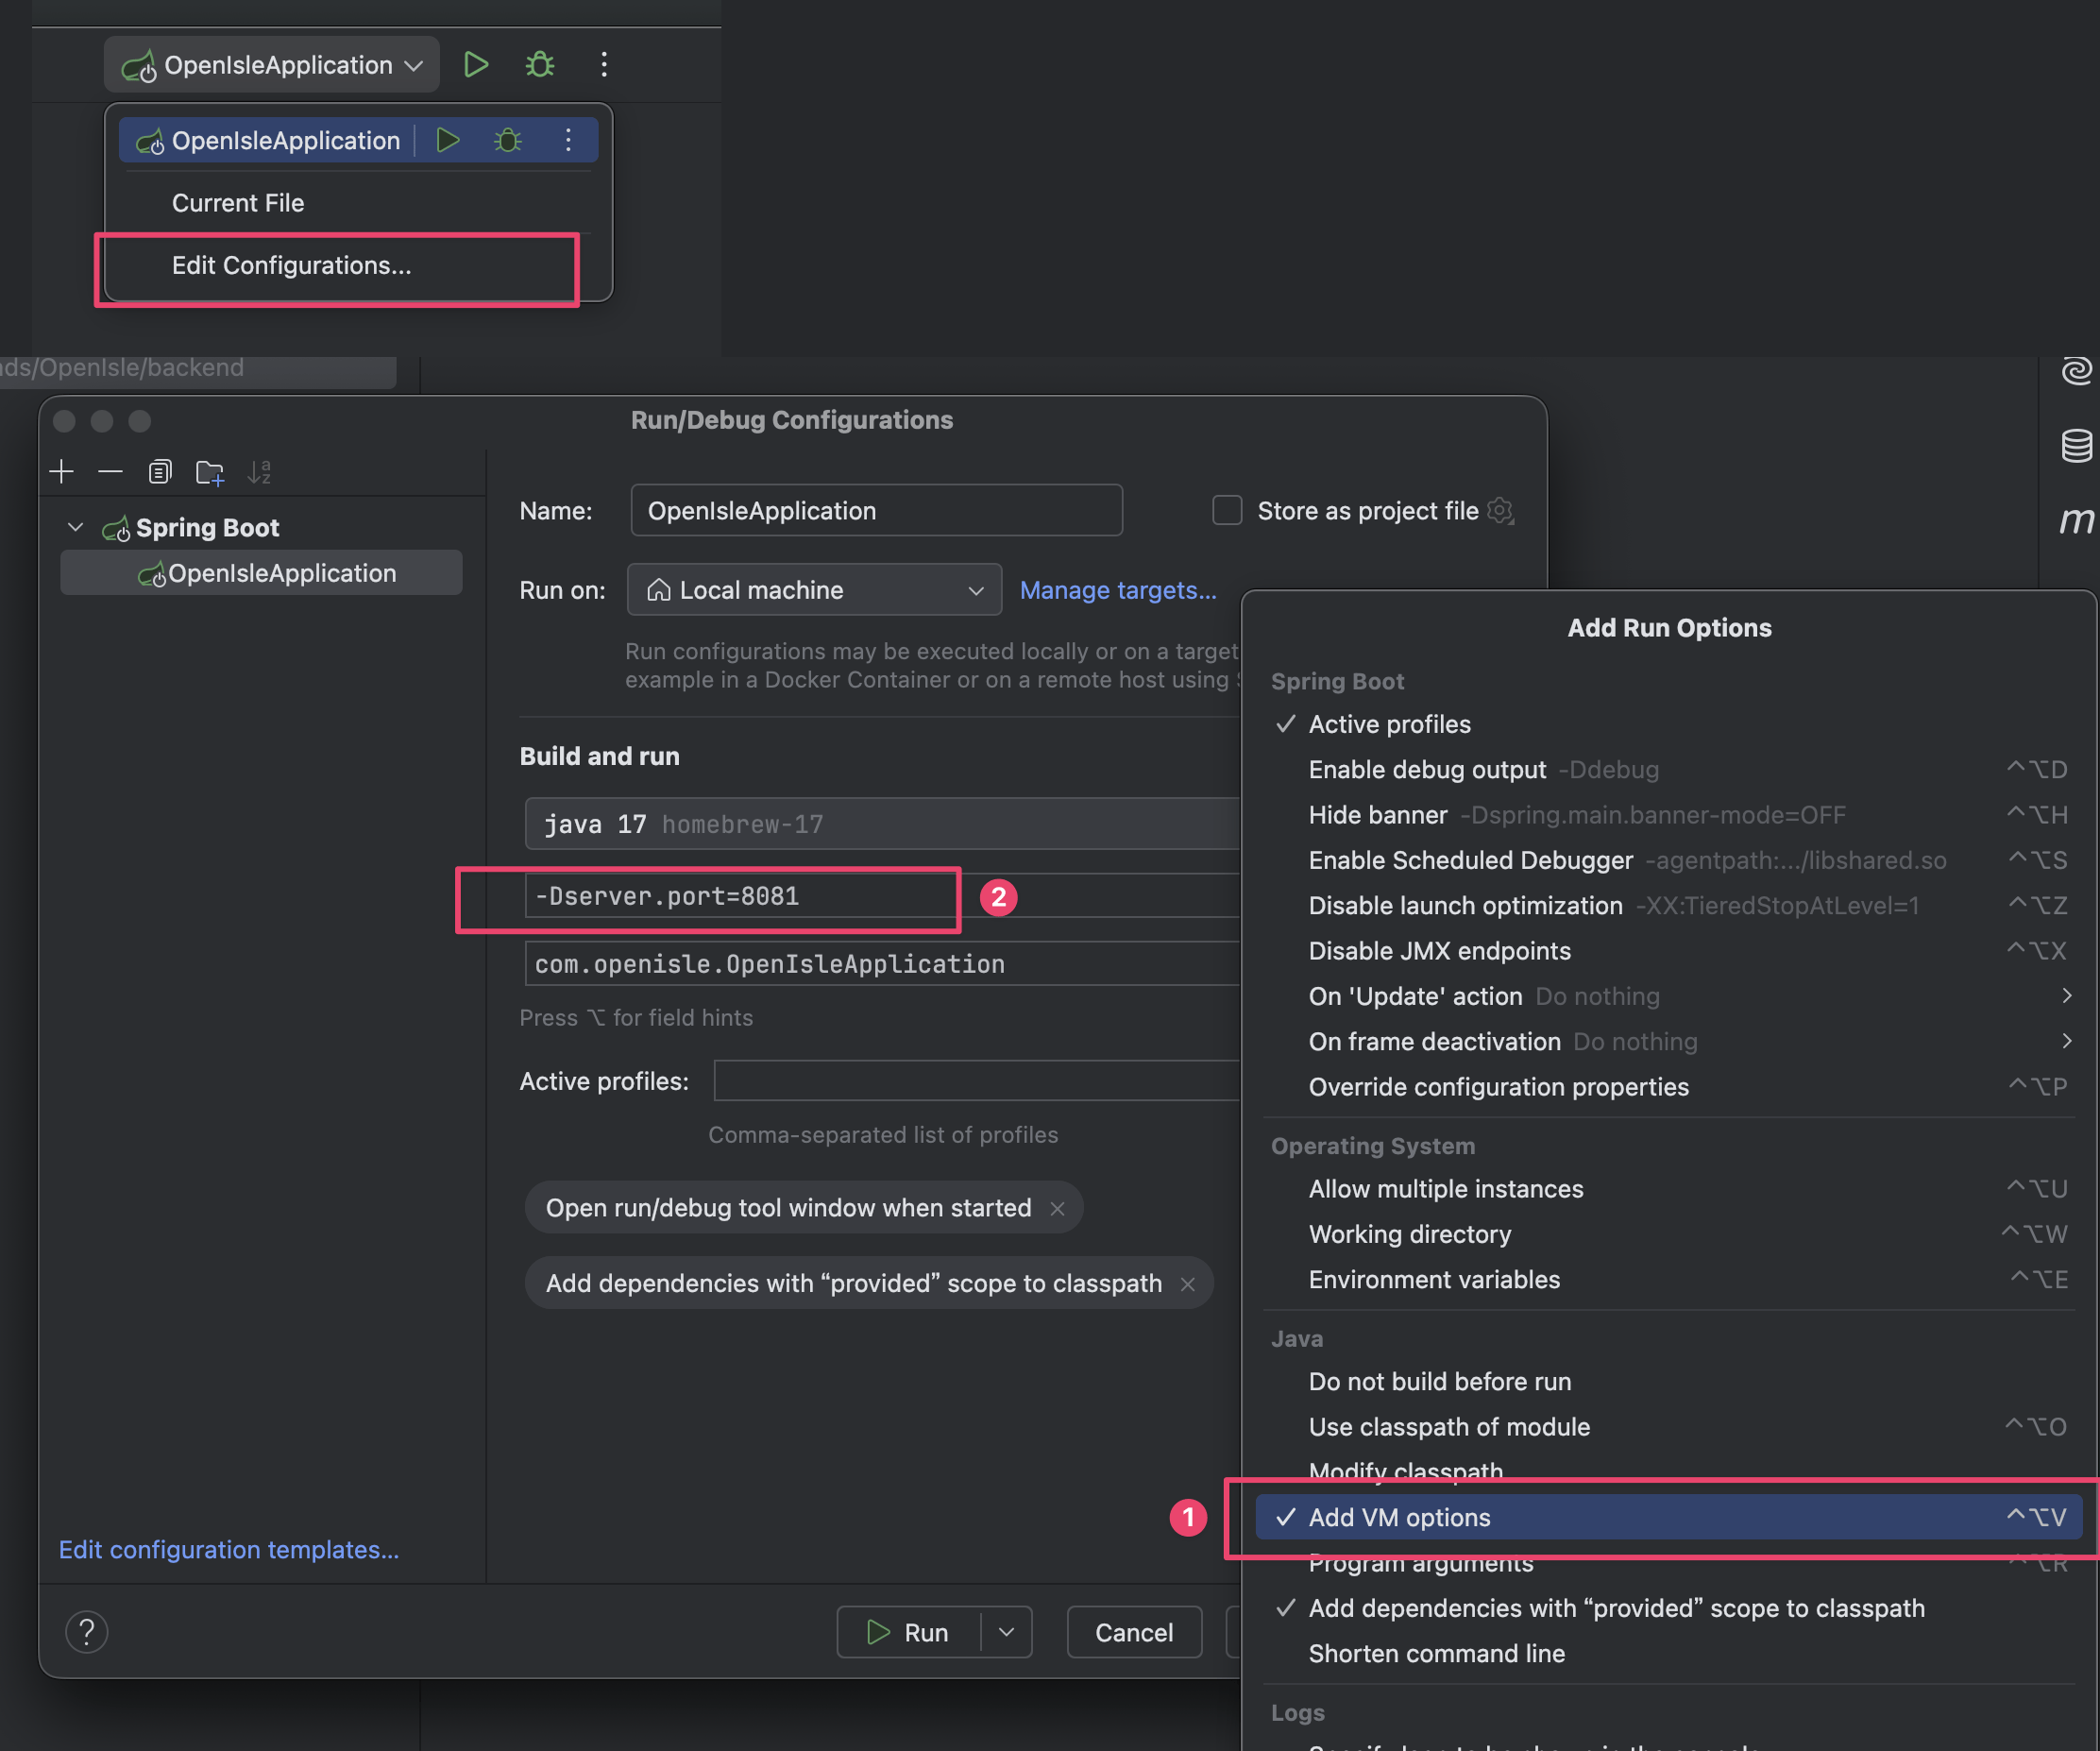
- 设置VM Option,最好运行在其他端口,非8080,这里设置8081
|
||
|
||
```shell
|
||
-Dserver.port=8081
|
||
```
|
||
|
||
|
||
|
||
- 设置jdk版本为java 17
|
||
|
||

|
||
|
||
- 本机配置MySQL服务(网上很多教程,忽略)
|
||
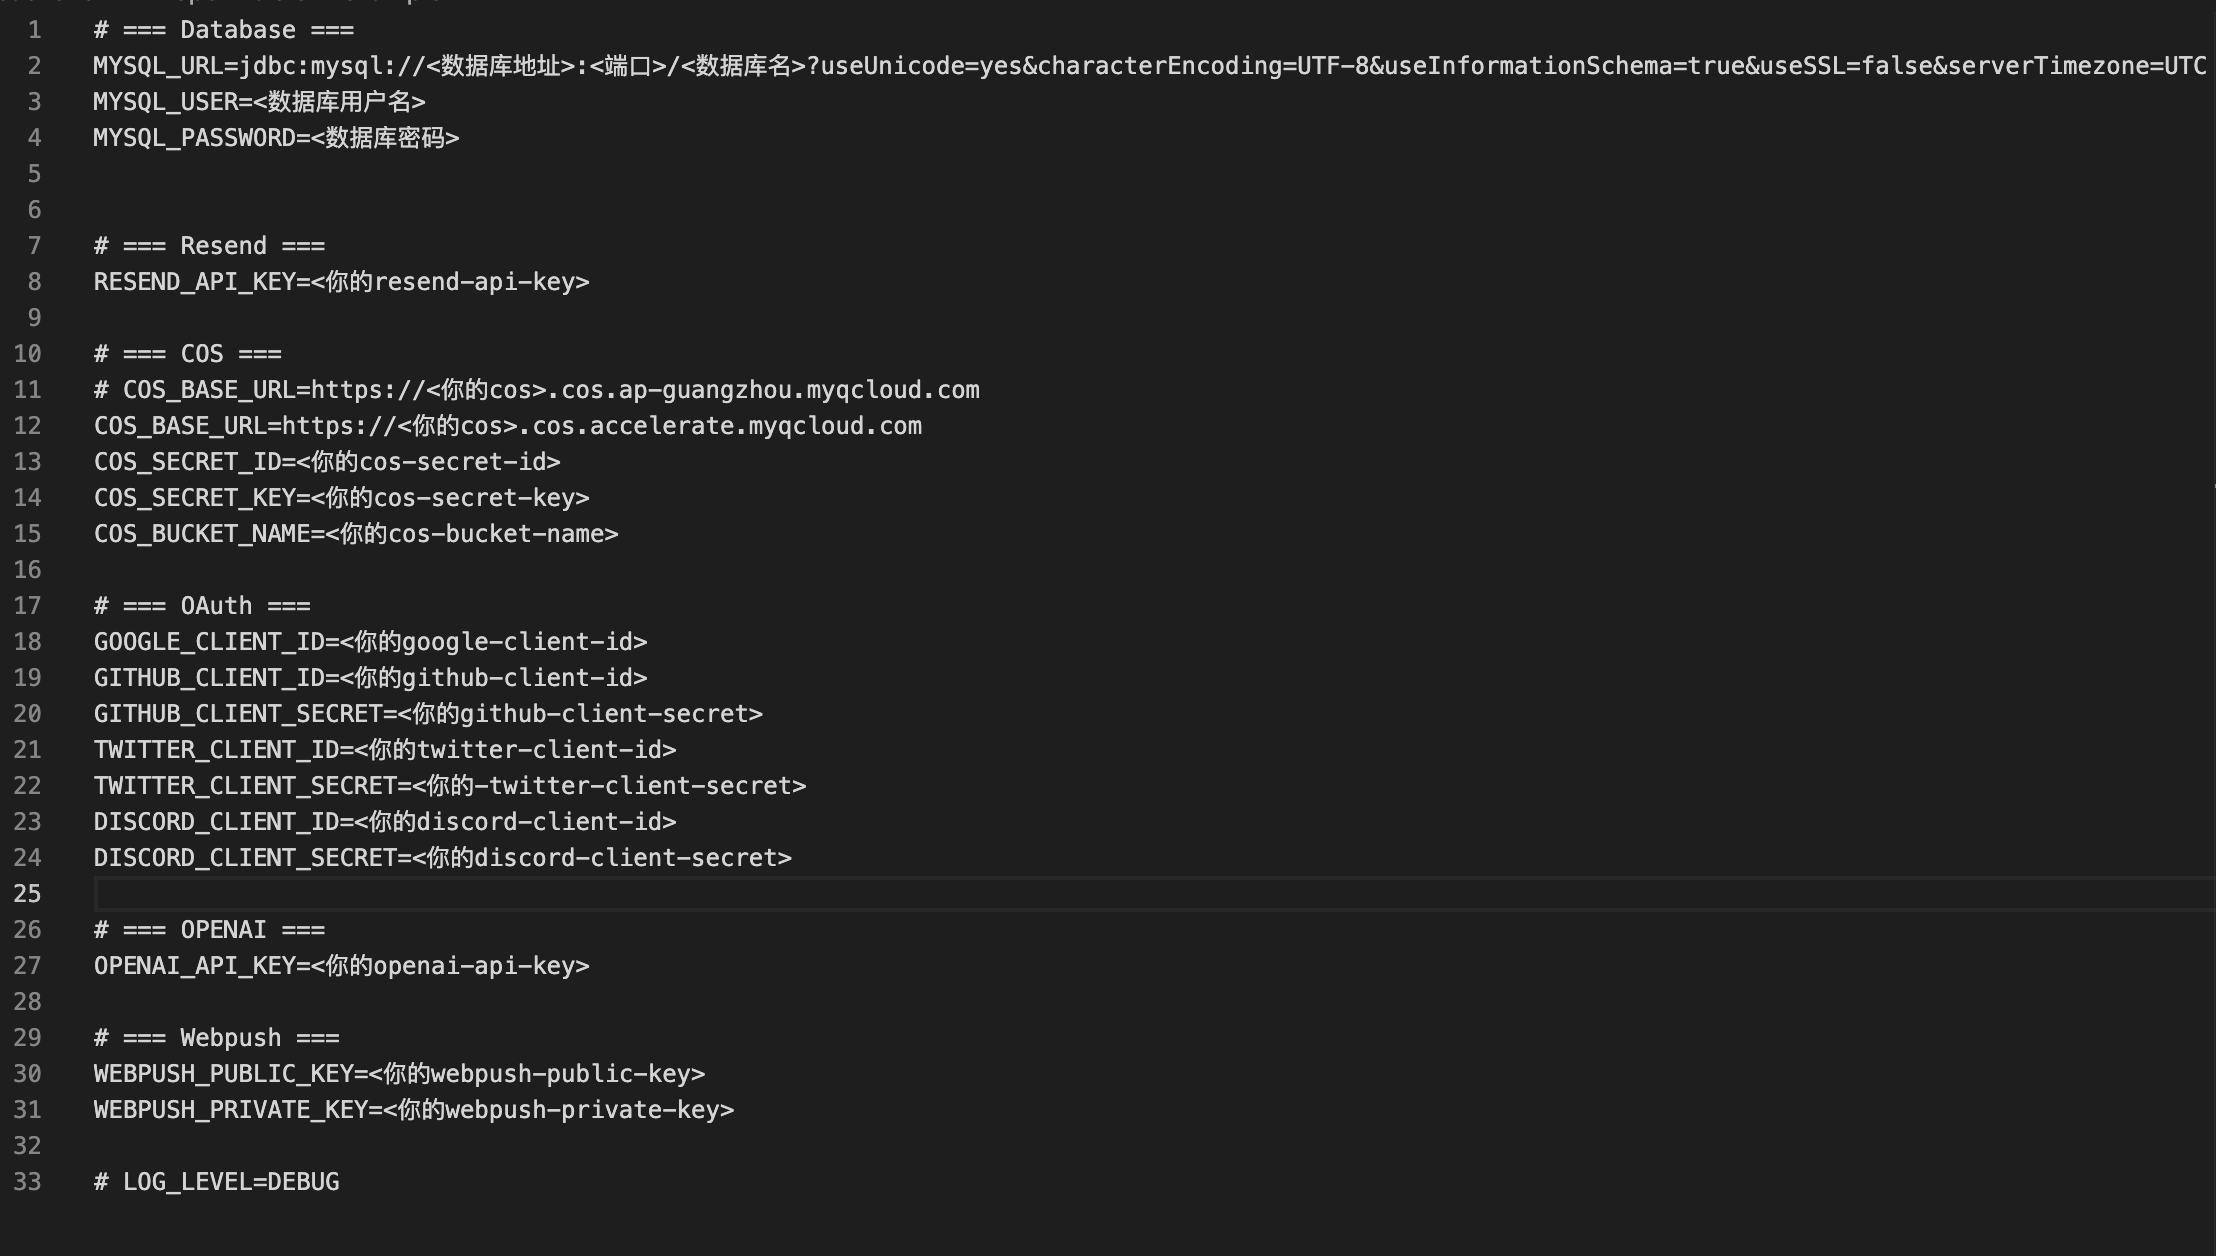
- 设置环境变量.env 文件 或.properties 文件(二选一)
|
||
|
||
1. 环境变量文件生成
|
||
|
||
```shell
|
||
cp open-isle.env.example open-isle.env
|
||
```
|
||
|
||
修改环境变量,留下需要的,比如你要开发Google登录业务,就需要谷歌相关的变量,数据库是一定要的
|
||
|
||
|
||
|
||
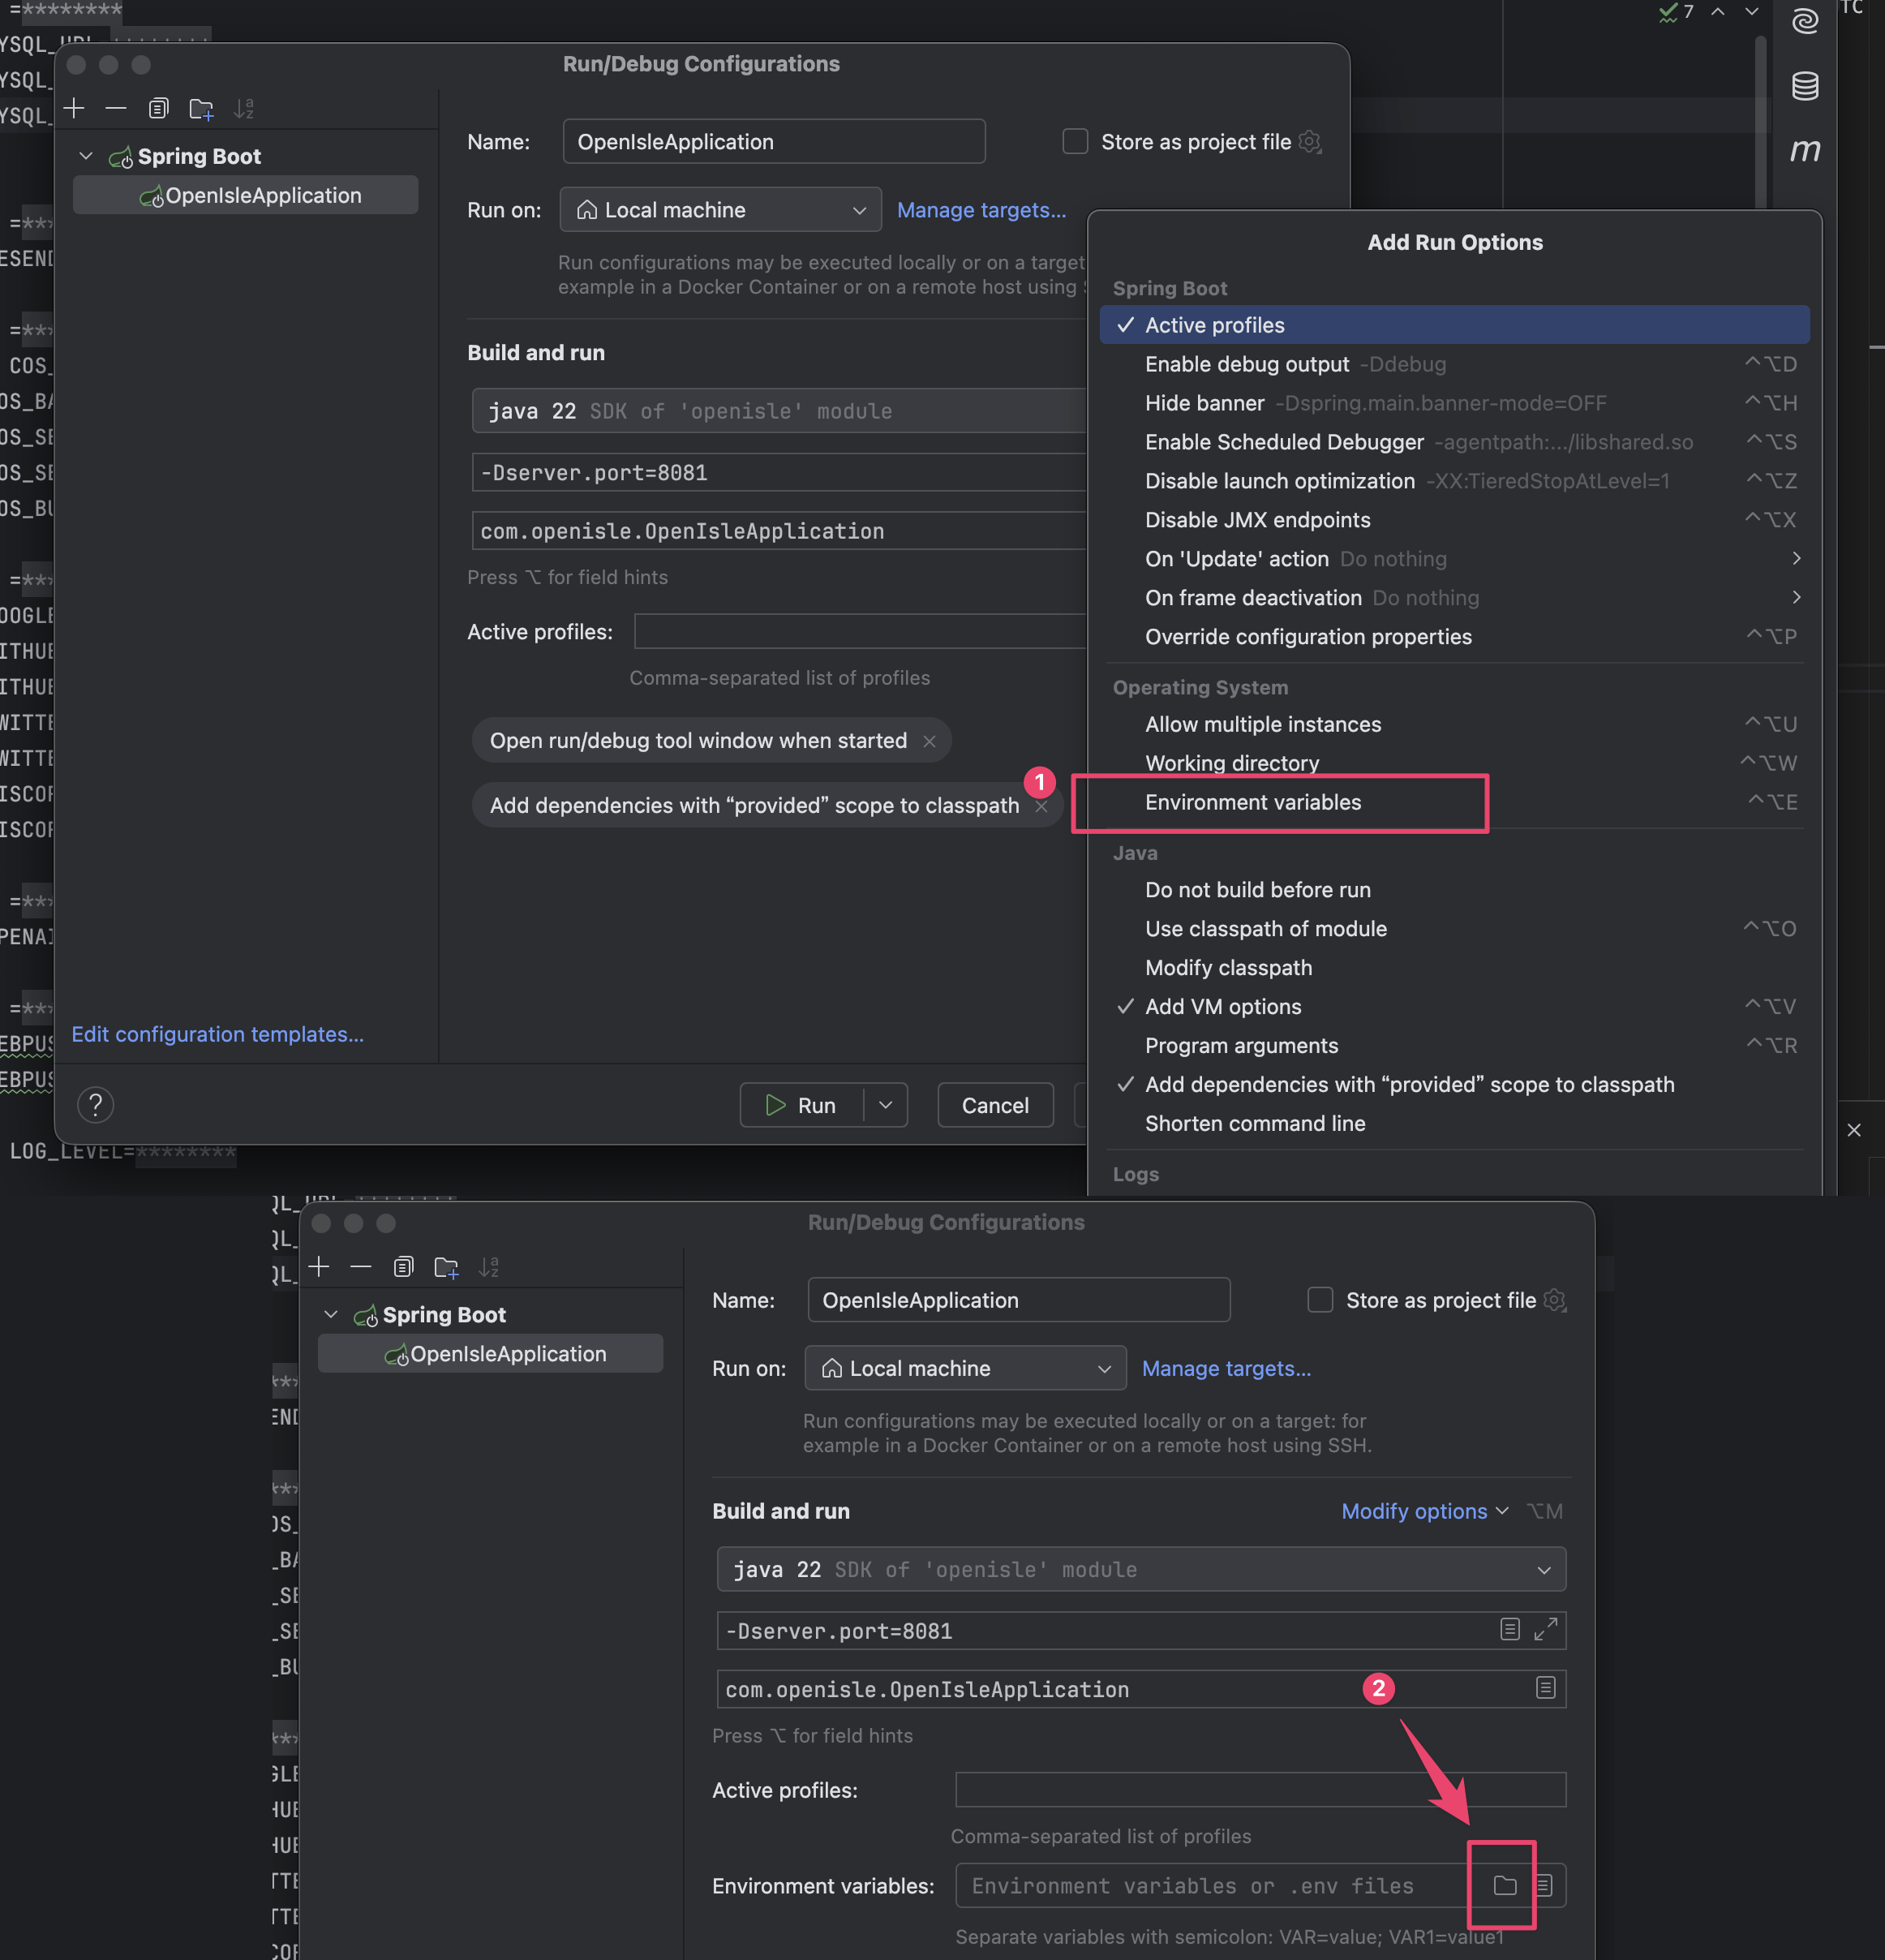
应用环境文件, 选择刚刚的`open-isle.env`
|
||
|
||
|
||
|
||
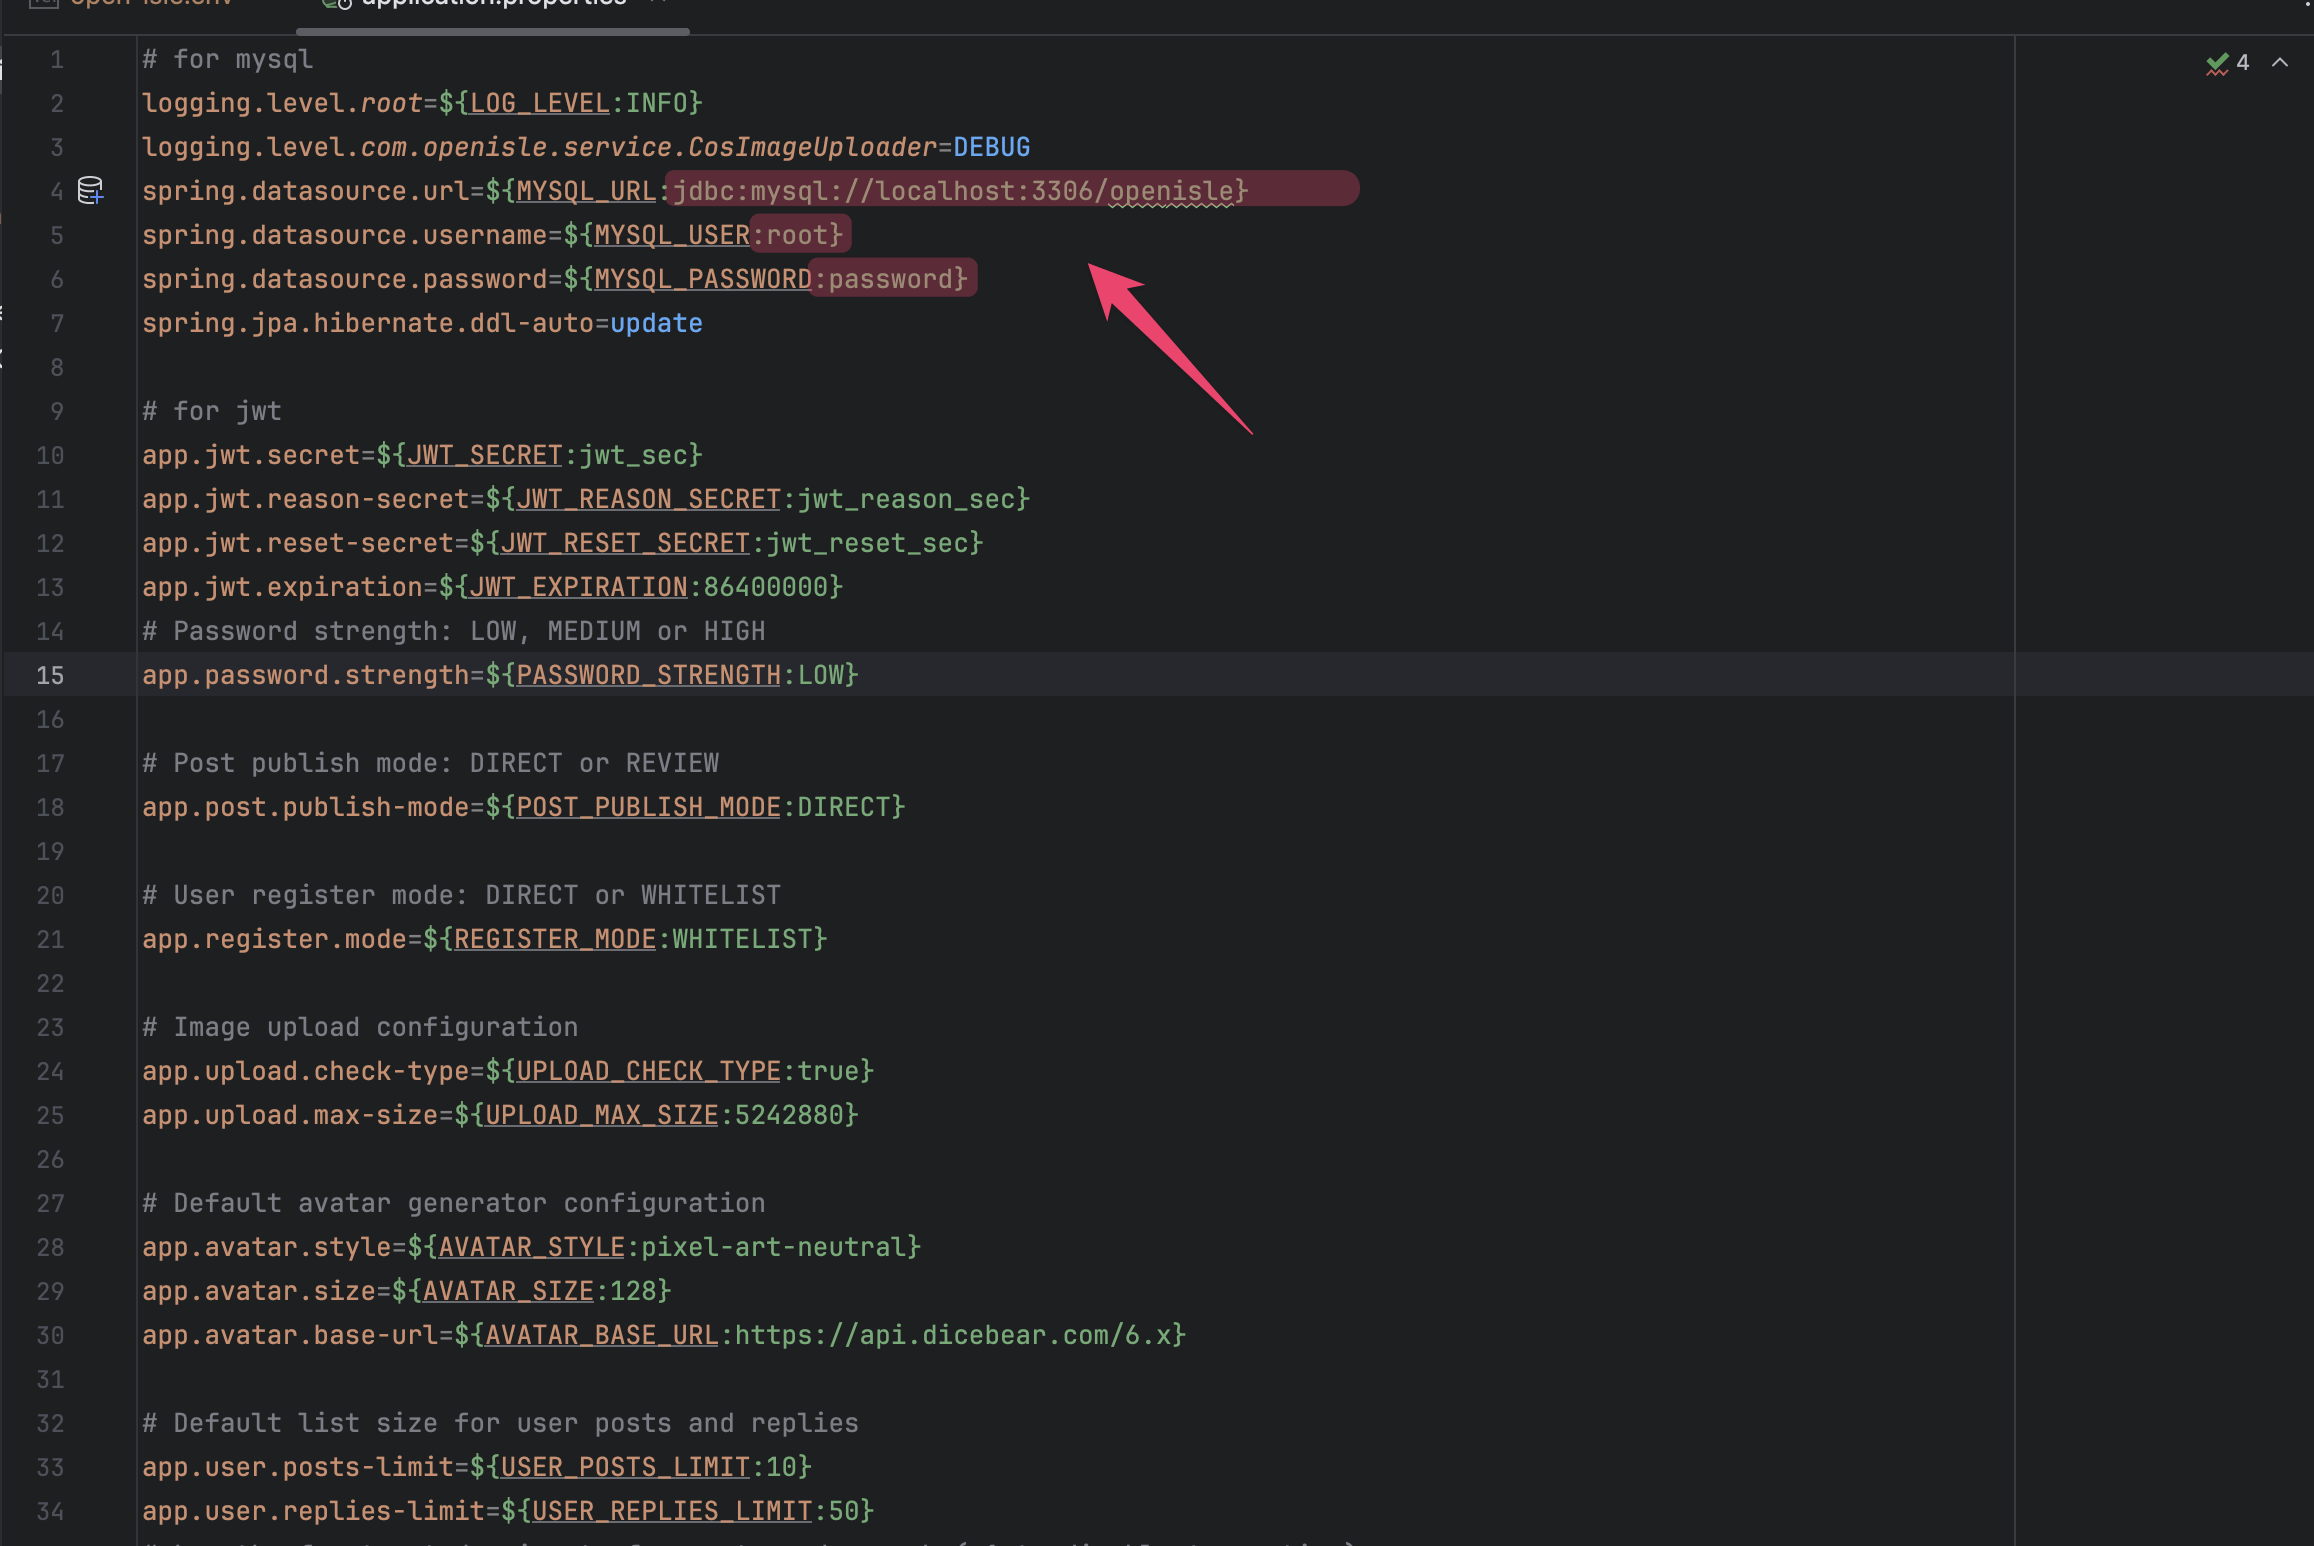
2. 直接修改 .properities 文件
|
||
|
||
位置src/main/application.properties, 数据库需要修改标红处,其他按需修改
|
||
|
||
|
||
|
||
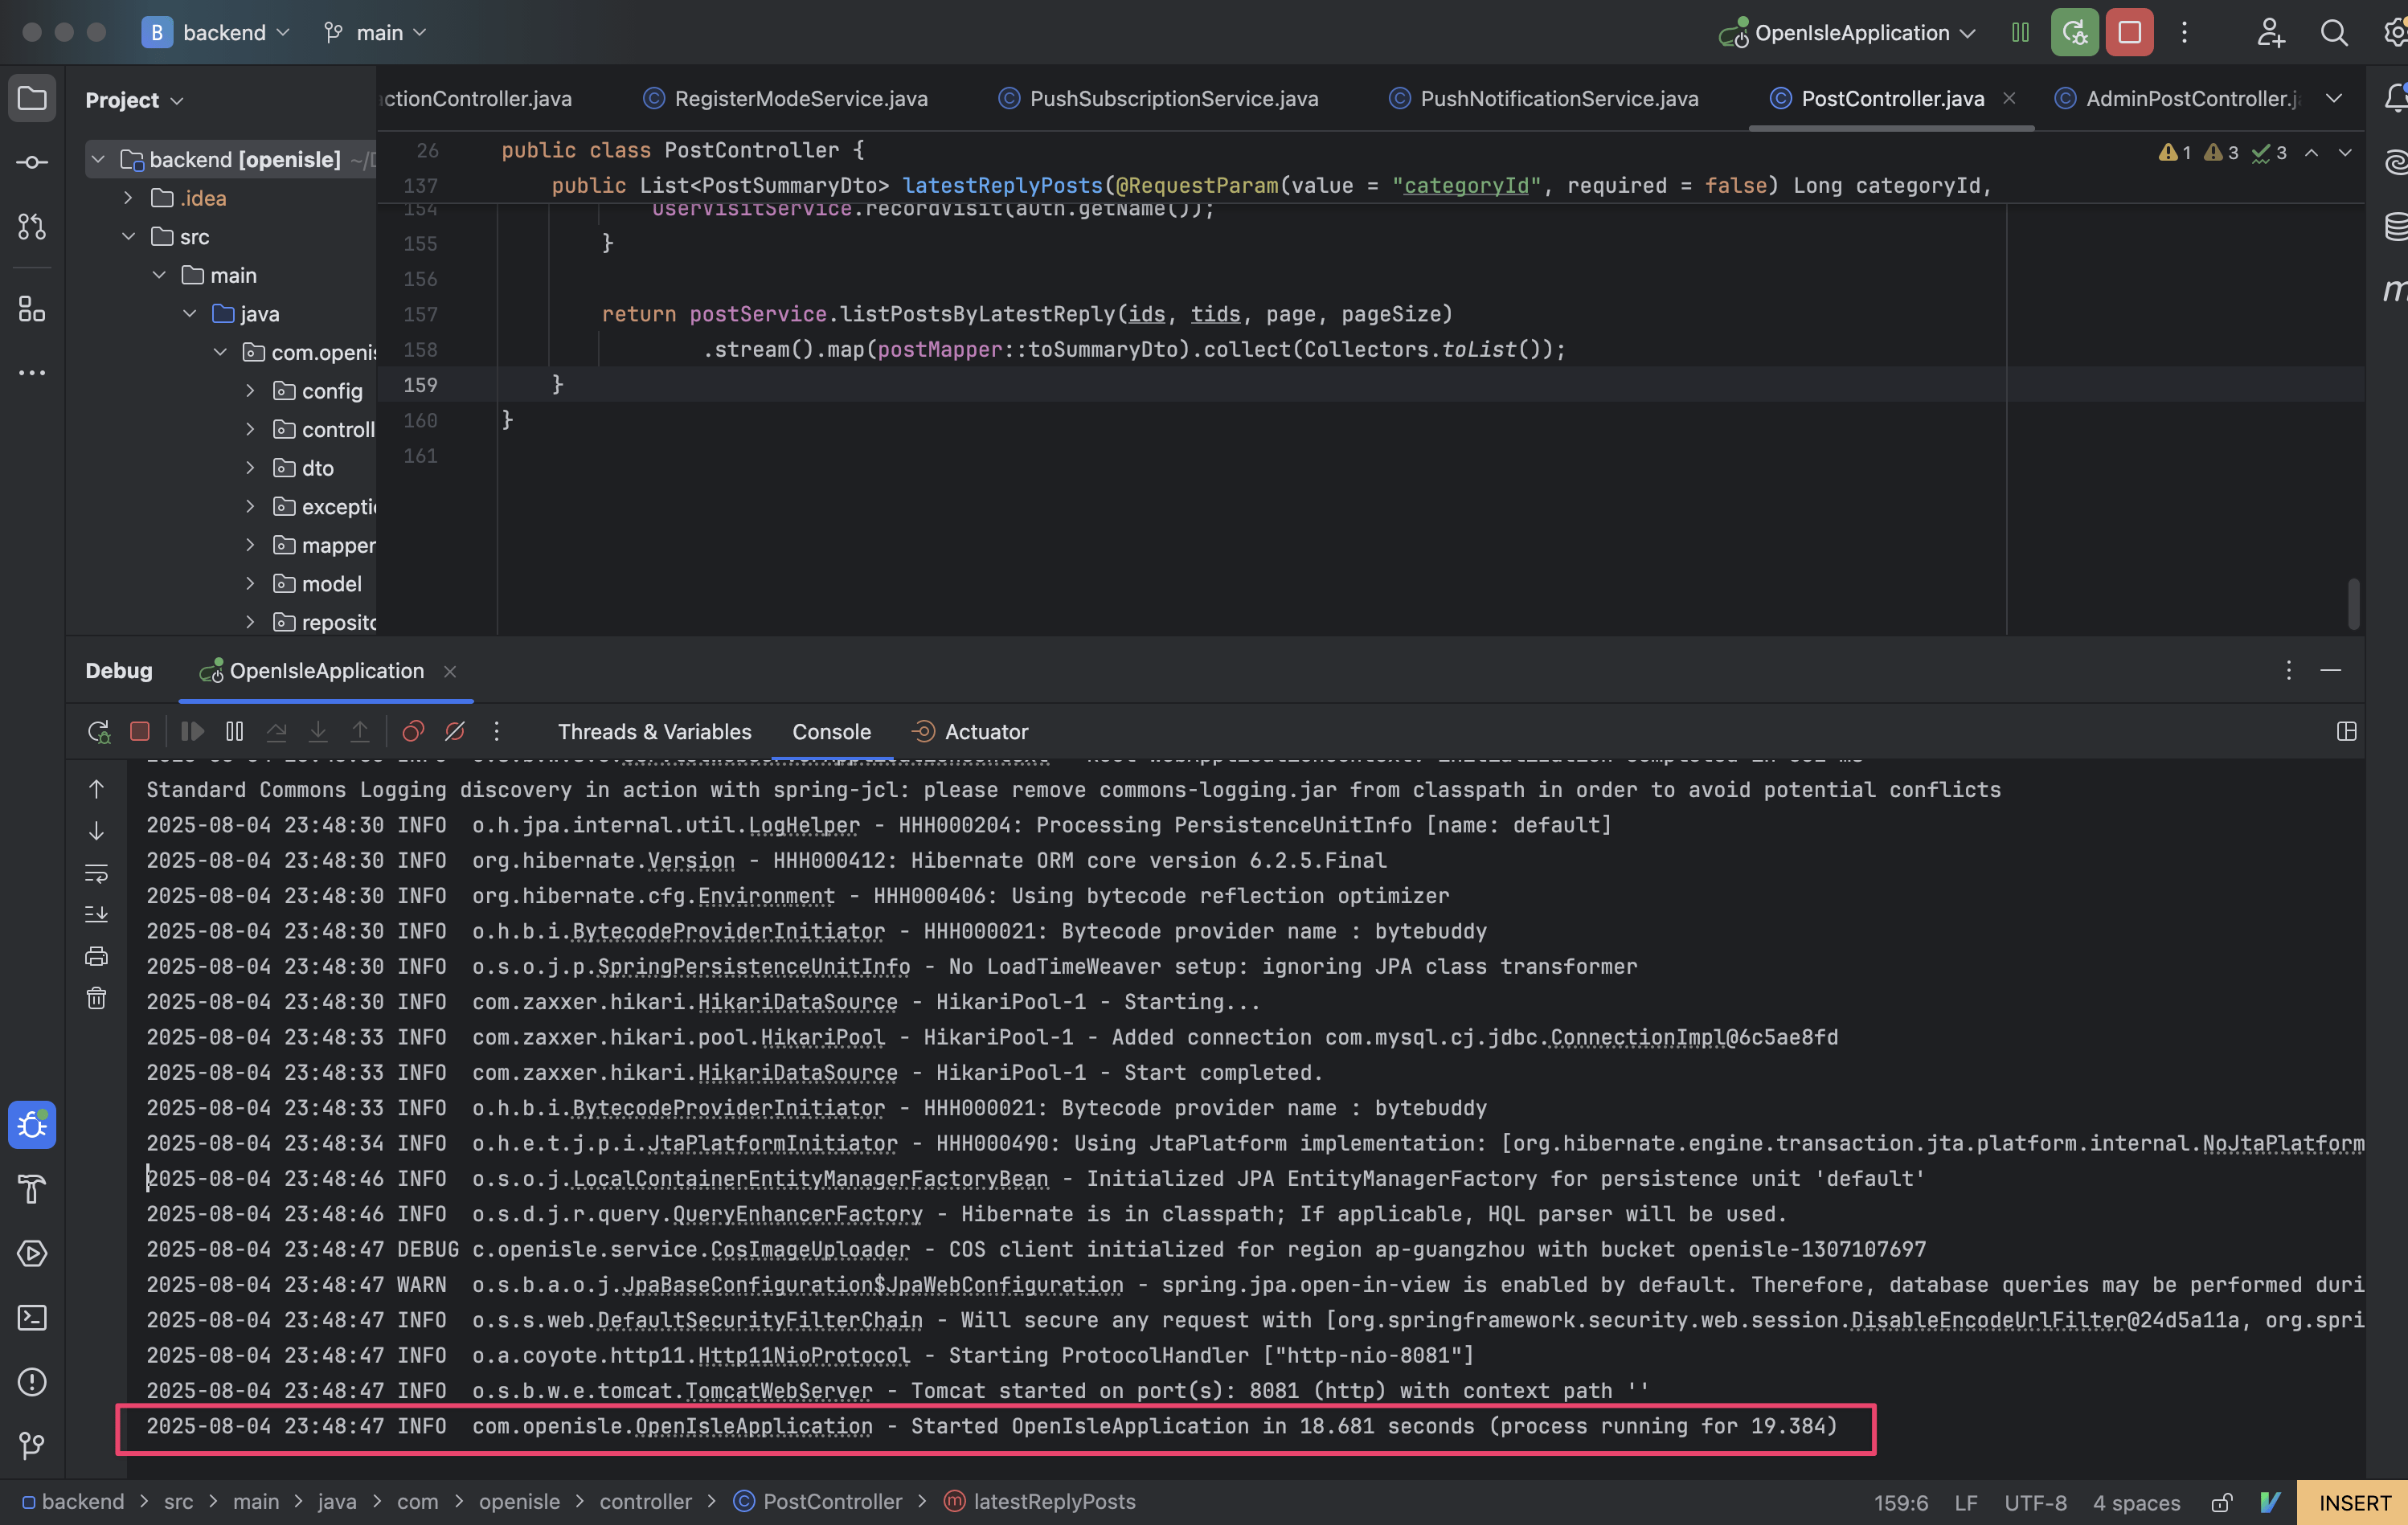
处理完环境问题直接跑起来就能通了
|
||
|
||
|
||
|
||
> Step3 前端部署
|
||
|
||
前端可以依赖本机部署的后端,也可以直接调用线上的后端接口
|
||
|
||
```shell
|
||
cd ../frontend_nuxt/
|
||
```
|
||
|
||
copy环境.env文件
|
||
|
||
```shell
|
||
cp .env.staging.example .env
|
||
```
|
||
|
||
1. 依赖本机部署的后端:打开本文件夹,修改.env 修改为瞄准本机后端端口
|
||
|
||
```yaml
|
||
; 本地部署后端
|
||
NUXT_PUBLIC_API_BASE_URL=https://127.0.0.1:8081
|
||
; 预发环境后端
|
||
; NUXT_PUBLIC_API_BASE_URL=https://staging.open-isle.com
|
||
; 生产环境后端
|
||
; NUXT_PUBLIC_API_BASE_URL=https://www.open-isle.com
|
||
```
|
||
|
||
2. 依赖预发环境后台环境
|
||
|
||
**(⚠️强烈推荐只部署前端的朋友使用该环境)**
|
||
|
||
```yaml
|
||
; 本地部署后端
|
||
; NUXT_PUBLIC_API_BASE_URL=https://127.0.0.1:8081
|
||
; 预发环境后端
|
||
NUXT_PUBLIC_API_BASE_URL=https://staging.open-isle.com
|
||
; 生产环境后端
|
||
; NUXT_PUBLIC_API_BASE_URL=https://www.open-isle.com
|
||
```
|
||
|
||
4. 依赖线上后台环境
|
||
|
||
```yaml
|
||
; 本地部署后端
|
||
; NUXT_PUBLIC_API_BASE_URL=https://127.0.0.1:8081
|
||
; 预发环境后端
|
||
; NUXT_PUBLIC_API_BASE_URL=https://staging.open-isle.com
|
||
; 生产环境后端
|
||
NUXT_PUBLIC_API_BASE_URL=https://www.open-isle.com
|
||
```
|
||
|
||
```shell
|
||
# 安装依赖
|
||
npm install --verbose
|
||
|
||
# 运行前端服务
|
||
npm run dev
|
||
```
|
||
|
||
如此一来,浏览器访问 http://127.0.0.1:3000 即可访问前端页面
|